
Before bulk purchasing automotive window film, you should not rely solely on the specification sheets provided by suppliers, nor should you judge the shade of the film based on a small sample.
Even if a window film’s VLT, IRR, or UVR data looks excellent, if the following issues arise during actual installation:
- Inconsistent tint;
- Noticeable haze;
- Difficulty peeling the release liner;
- Uneven adhesive layer;
- Difficulty controlling heat shrinkage;
- wrinkling during rear window installation;
- a difference in texture between bulk orders and samples;
it may still not be a suitable product for dealers to sell long-term.
Therefore, automotive window film sample testing should address three issues simultaneously:
First, does the product’s appearance align with the target market?
Second, are the technical data and actual installation performance reasonable?
Third, can the supplier consistently reproduce this tested sample for mass production orders?
For importers, distributors, installer networks, and private-label brands, what truly needs to be established is not a one-time “sample review,” but a reusable Sample Approval Process.
Quick Answer: What should be tested in automotive window film samples?
Before placing a mass production order, it is recommended to check at least the following items:
| Test Items | Main Purpose |
|---|---|
| Sample Identification | Confirm SKU, VLT, batch, and product type |
| Shade / Color | Confirm whether the color orientation is suitable for the market |
| Optical Clarity | Check clarity and visual distortion |
| Haze | Check for noticeable haze |
| VLT | Verify that the shade depth aligns with expectations |
| Technical Data | Verify basic data such as TSER, IRR, IRER, UVR, etc. |
| Liner Release | Check whether the release liner peels off smoothly |
| Adhesive | Check positioning, sliding, and adhesive layer performance |
| Heat Shrink | Check installation capability on curved rear window surfaces |
| Real Installation | Verify installation performance on actual glass |
| Day / Night View | Check visual appearance during the day and at night |
| Settled Appearance | Re-examine clarity and adhesive layer after settling |
| Installer Feedback | Record actual installation experience |
| Approved Sample | Establish a reference sample for future batches |
The most important point is:
Small samples are suitable for screening, but sample rolls that can be used for actual installation are more suitable for final approval.
What is the difference between small samples and sample rolls?
Suppliers may provide you with two different types of samples.
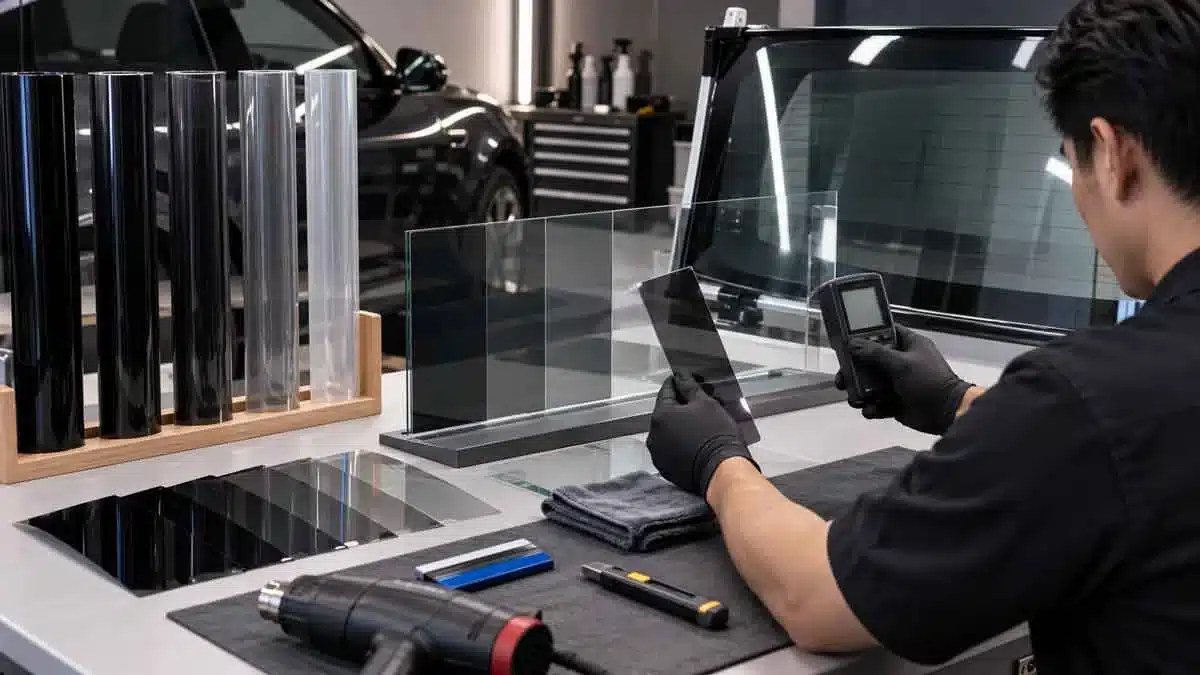
Small-size samples
For example:
- A4 samples;
- Small glass sample pieces;
- Shade cards.
Suitable for checking:
- Color;
- shade depth;
- VLT orientation;
- reflectivity;
- base clarity.
However, they cannot fully verify:
- post-installation heat shrinkage;
- adhesive layer performance over large areas;
- roll unrolling;
- liner stability;
- actual installation efficiency.
Sample roll
Sample rolls are better suited for final purchase confirmation.
Because installers can actually test:
- side windows;
- rear window;
- curved glass;
- heat shrinking;
- adhesive;
- liner release;
- squeegee feel.
Therefore, a simple principle can be applied:
Small sample for screening. Sample roll for approval.
Step 1: First, verify the sample’s identification
This is a step that many buyers tend to overlook.
Do not test a sample that lacks any identifying information.
Every automotive window film sample entering the testing process should at least include the following information:
- Supplier
- Product Model
- Film Type
- VLT
- Thickness
- Color / Shade
- Sample Date
- Batch / Lot Number (if available)
For example:
Supplier A
Nano Ceramic NC35
VLT 35%
Neutral Black
Sample Batch 260901
This ensures that later on, we can determine:
Which specific product we ultimately approved.
If a supplier sends five pieces of film that look different without specifying SKUs, it will be difficult to guarantee that a bulk order corresponds to the same base film, even if one of the samples performs well.
Therefore:
Do not approve anonymous samples.
Step 2: Read the specification sheet before testing
Sample testing is not a substitute for the Technical Data.
The correct sequence should be:
Read the specification first
Then:
Test the physical sample
For example, you should first know:
- VLT
- Thickness
- TSER
- IR Metric
- UVR
- Color
- Roll Size
This way, you’ll know exactly what you’re verifying during actual testing.
If a supplier states:
IR Rejection 98%
but does not specify:
- IRR or IRER;
- wavelength range;
- test basis;
testing the sample will not automatically make this data complete.
To learn how to properly compare VLT, TSER, IRR, IRER, and UVR, you can first refer to FUNO’s Automotive Window Film Specs Guide:
/automotive-window-film-specs/
Step 3: Check Color and Shade First
Ultimately, automotive window film is first and foremost a visual product.
Color preferences vary greatly across different markets.
Common options include:
- neutral black;
- charcoal;
- blue-black;
- brown;
- green;
- reflective;
- chameleon.
When testing, do not view the film solely under office LED lighting.
We recommend observing it under at least the following conditions:
Indoor neutral lighting
to assess the base color.
Natural light
to observe the actual appearance from outside the vehicle.
Viewing from outside the vehicle toward the interior
Check:
- privacy;
- reflectivity;
- color tone.
View from inside the vehicle to the outside
Check:
- color cast;
- clarity;
- driver visibility.
A film that looks great from the outside may not be suitable for all markets if it appears noticeably blue, green, or purple when viewed from inside the vehicle.
Step 4: Check both during the day and at night
Low-VLT automotive window films especially require a night visibility check.
A film that performs well during the day may not be equally comfortable at night.
Recommended checks:
- Streetlights at night;
- Oncoming headlights;
- Internal reflections;
- Rearview mirror area;
- Target recognition in low-light conditions.
The goal here is not to establish an “industry rating for nighttime performance.”
Rather, the goal is to answer:
Are this VLT and shade suitable for the target market?
For example, a 5% VLT product may be suitable for the rear-seat privacy market, but it may not be suitable for all window locations.
Therefore, product testing must be conducted in the context of actual usage.
Step 5: Check Optical Clarity and Haze
The transparency of automotive window film cannot be judged solely from small samples with liners.
The release liner itself may affect:
- haze;
- reflection;
- surface appearance.
Therefore, it is recommended to conduct inspections at three levels.
Level 1: Loose Sample
Preliminary screening to rule out:
- obvious cloudiness;
- obvious color discrepancies;
- coating issues.
Level 2: Remove the Liner
Further examine the film itself after removing the liner.
Level 3: Install on Clean Glass
Ultimately, the following should serve as:
the appearance after installation on clean glass
the primary basis for judgment.
Inspect by observing:
- text;
- straight lines in the distance;
- building outlines;
- LED light strips;
- distant objects
to check for:
- haze;
- distortion;
- waviness;
- double images.
For professional distributors:
Installed clarity is more important than holding a piece of film in your hand.
Step 6: Test VLT using the same piece of reference glass
VLT is one of the parameters that is relatively easy to retest on-site.
However, the test requires controlled variables.
It is recommended to use:
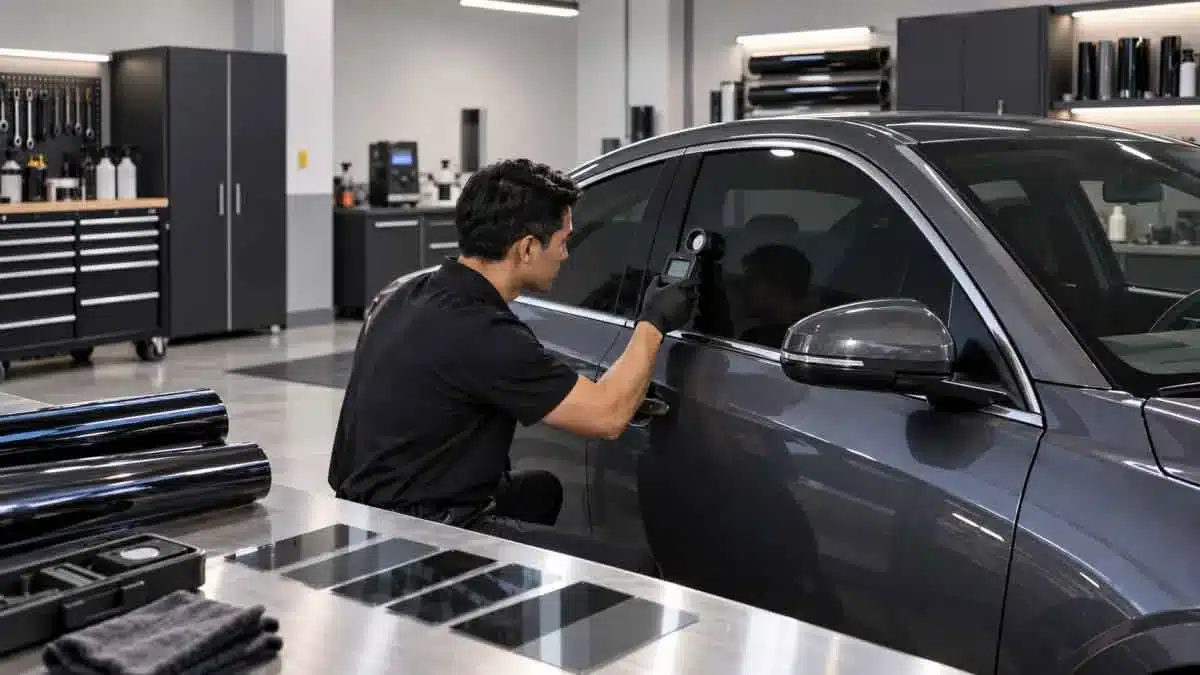
The same instrument
+
the same reference glass
+
the same location
+
the same testing method
Compare:
- Current Approved Film
- Supplier A
- Supplier B
- Supplier C
This helps determine:
which sample deviates significantly from the supplier’s nominal VLT value.
However, do not expect a handheld meter to yield exactly the same reading as the supplier’s laboratory TDS.
Possible reasons include:
- instrument differences;
- test substrate;
- calibration;
- tolerance;
- film-only vs. film-on-glass.
Therefore, on-site VLT testing is best suited for:
relative comparison and consistency checks
rather than replacing formal technical testing.
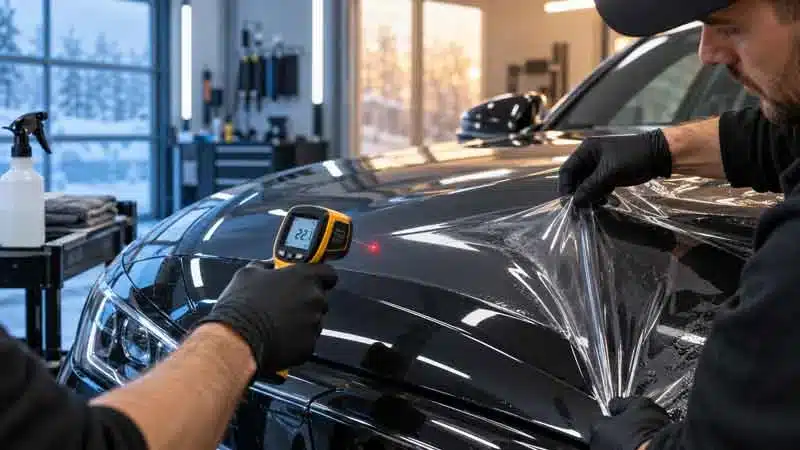
Step 7: How to Properly Verify IR and Heat-Blocking Claims?
This is the area where automotive window film procurement is most prone to misrepresentation.
Many suppliers will showcase:
- IR meter;
- UV meter;
- heat lamp;
- temperature demonstration.
These tools can help with simple comparisons.
However, they should not be interpreted as:
a complete laboratory performance validation.
This is especially true for IR data.
A handheld device may only measure a specific:
- wavelength;
- narrow band.
Meanwhile, the IRER in the specification sheet may cover a broader wavelength range.
Therefore:
Handheld IR reading ≠ full laboratory IRER verification
It is even less acceptable to use a small meter to directly prove that:
the supplier’s TSER is completely accurate.
Why can’t a heat lamp demonstration be equated with a TSER test?
Heat lamp demonstrations are very common.
For example:
- two pieces of glass;
- two types of film;
- an infrared lamp;
- a touch sensor or temperature meter.
It is ideal for:
allowing customers to intuitively experience the differences between two films under the same demonstration conditions.
However, it cannot automatically prove:
- TSER;
- full-spectrum solar performance;
- standard IRER;
- actual long-term interior vehicle temperature.
The reason is:
Real solar radiation does not come from a single light source or a single infrared wavelength.
Therefore:
A heat lamp is a demonstration tool, not a complete certification of solar performance.
Dealers can use this demo for sales presentations.
However, bulk purchasing decisions should still be based on:
- TDS;
- test method;
- sample installation.
Step 8: Check the liner peel performance
During daily installation of automotive window film, the liner is handled frequently.
Therefore, the quality of the release liner directly affects the installer’s experience.
Check:
- Is the starting point for peeling easy to locate?;
- Is the peel consistent?;
- Is it too tight?;
- Is it too loose?;
- Does it wrinkle easily?;
- Do the film and liner remain flat?
If the liner release is unstable, it may increase:
- contamination;
- handling difficulties;
- installation time.
These types of issues typically do not appear in product descriptions for general consumers, but they are very important for the installer network.
Step 9: Inspect the Adhesive Layer and Wet Positioning
Automotive window film is typically installed using the wet method.
Therefore, the sample must be actually installed on automotive glass.
Observe:
- whether the film slides easily during positioning;
- whether it suddenly grips the adhesive;
- whether water is drained smoothly with the squeegee;
- Is the adhesive layer clear and clean?;
- Does it tend to leave adhesive streaks?;
- Is the edge finishing consistent?
Do not apply PPF testing logic here.
Automotive window film does not need to be tested for:
- self-healing;
- hydrophobic topcoat;
- extreme stretch;
- PPF edge wrapping.
What automotive window film should actually be tested for:
Alignment + Water drainage + Adhesive layer clarity + Shrinkage + Final appearance
Although both industries deal with film, the installer workflows are completely different.
Step 10: Heat Shrinking is one of the most important tests for automotive window film
If your clients include professional tint shops, you can’t just install film on a single flat side window.
You must test curved glass.
Especially:
rear windshield.
Because the rear windshield typically has significant compound curvature.
The installer must use heat shrinking to make the film conform to the glass.
Key points to observe:
- shrink direction;
- shrink speed;
- shrink control;
- finger formation;
- crease tendency;
- sensitivity to overheating;
- spring-back;
- surface stability.
Do not simply write:
“shrinks fast.”
Faster heat shrinkage is not necessarily better.
Professional installers place greater emphasis on:
predictable shrink behavior
That is:
- controllable;
- repeatability;
- resistance to sudden excessive shrinkage;
- resistance to creasing.
Step 11: Different installers should use the same heat-shrink conditions
If Supplier A is tested by a skilled installer,
and Supplier B is tested by a novice,
the results are not very comparable.
Control the following as much as possible:
- same installer;
- same glass;
- same heat gun;
- similar heat setting;
- similar working area.
Only then can the films be truly compared.
If multiple testers are required, their feedback should be recorded separately rather than combined.
Step 12: Complete a Real-World Installation on an Actual Vehicle
After the bench test, it is best to perform an installation on an actual vehicle.
Select:
- side windows;
- rear window;
At least two different glass conditions.
Why?
Because only a real-world installation can reveal:
- cutting behavior;
- wet positioning;
- liner handling;
- shrinkage;
- sensitivity to contamination;
- final clarity;
- edge finishing.
Only this step truly transforms:
sample
into:
commercial product evaluation.
Step 13: Do not make a final judgment immediately after installation
Automotive window films typically use wet installation.
After installation, the following may still be present between the film and the glass:
- moisture;
- temporary haze;
- water pockets.
Therefore, the appearance immediately after installation is not necessarily the final state.
This should be divided into:
Immediate Inspection
Check for:
- gross contamination;
- large creases;
- incorrect fit;
- obvious defects;
- color.
Settled Inspection
Inspect again after the film has stabilized sufficiently:
- haze;
- optical clarity;
- adhesive appearance;
- final edge;
- distortion.
Do not immediately conclude that the product is:
non-conforming
At the same time, do not attribute all persistent issues—
- creases;
- distortion;
- contamination
—to the notion that “the moisture will disappear on its own.”
Step 14: Inspect Appearance in White Daylight and at Night
Before final approval, it is best to drive the vehicle in different lighting conditions.
Observe:
Daylight
- external color;
- reflection;
- privacy;
- shade uniformity.
Indoor / Garage
- Neutral light color;
- Visual consistency.
Night
- Driver visibility;
- Interior reflection;
- glare impression.
This step is particularly suitable for:
- Chameleon Film;
- Sputtered Film;
- low-VLT products.
Step 15: Have the installer provide structured feedback
Don’t just ask:
“How is this film?”
The typical response is:
“It’s okay.”
This provides no value for procurement.
We recommend asking the installer to answer the following separately:
| Project | Evaluation |
|---|---|
| Liner release | Easy / Normal / Difficult |
| Wet positioning | Easy / Normal / Difficult |
| Squeegee response | Good / Average / Poor |
| Shrink control | Good / Average / Poor |
| Crease tendency | Low / Medium / High |
| Optical clarity | Good / Average / Poor |
| Final appearance | Accept / Review / Reject |
You can also add the following note:
What felt different from our current film?
This kind of feedback is particularly valuable.
How can we fairly compare multiple suppliers?
If you receive samples from three suppliers at the same time, be sure to control for variables.
Recommendations:
same reference glass
same meter
same installer
same heat gun
same lighting
same shrink area
same settling period
Otherwise, it’s easy to end up with:
Supplier A is actually fine; it’s just that the shop was colder that day.
Or:
Supplier B’s clarity appears poor simply because the glass is dirtier.
The core of procurement testing isn’t complexity.
Rather, it is:
control the variables.
We recommend creating a Sample Comparison Sheet
Don’t rely on memory.
Create a simple table:
| Test Item | Supplier A | Supplier B | Current Film | Decision |
|---|---|---|---|---|
| Shade | ||||
| Daylight appearance | ||||
| Night visibility | ||||
| VLT | ||||
| Clarity | ||||
| Haze | ||||
| Liner release | ||||
| Adhesive | ||||
| Shrink | ||||
| Crease tendency | ||||
| Final appearance | ||||
| Installer feedback |
Do not set a so-called:
Shrink = 30 points
IR = 20 points
global uniform weighting.
Purchasing priorities vary significantly across different markets.
For example:
Middle East market
may place greater emphasis on:
- heat control;
- clarity;
- durability.
The European market
may place greater emphasis on:
- legal VLT;
- optical clarity;
- neutral appearance.
The installer network
may place greater emphasis on:
- shrinkage;
- adhesive;
- labor time.
Therefore, the final scoring weights should be defined by the buyer.
If the A4 sample passes, can we place a bulk order?
Not recommended.
A4 samples are suitable for:
- shade;
- initial clarity;
- VLT direction.
However, they cannot fully test:
- rear-glass shrinking;
- roll handling;
- liner consistency;
- actual installation.
Therefore, a more reasonable approach is:
Small Sample
↓
Shortlist
↓
Sample Roll
↓
Installation Test
↓
Approval
For larger purchase volumes, you can also add:
Pilot Order
Followed by:
Full Bulk Order
What is an Approved Reference Sample?
Once a window film has passed:
- Technical Review;
- Visual Test;
- Installation Test;
it should not be discarded immediately.
It should become:
Approved Reference Sample
We recommend recording the following:
- SKU;
- VLT;
- Batch;
- Approval Date;
- Meter Reading;
- Photos;
- Installer Notes.
Upon arrival of the first bulk shipment:
A comparison can be performed again.
For example:
Does the shade of the current bulk roll match the approved sample?
Is there a noticeable change in the shrink feel?
Has the adhesive changed?
This step is crucial for private label brands.
A good sample does not necessarily mean a consistent supplier
This is essential to keep in mind when purchasing in bulk.
A supplier can produce:
a very good sample.
The real challenge is:
whether the next batch of 500 rolls will be the same.
Therefore, long-term procurement must focus on:
- VLT consistency;
- shade consistency;
- adhesive consistency;
- liner consistency;
- shrink consistency;
- roll quality.
If:
The first sample was excellent,
the first bulk shipment was also good,
but starting with the second batch, the shade was different,
so the earlier sample approval did not truly address the supply risk.
Therefore:
Sample approval is the start of quality control, not the end.
Why is a pilot order still needed after sample approval?
For:
- New suppliers;
- New film constructions;
- New private label projects;
Jumping directly from an A4 sample to a large bulk order carries a high risk.
A small-scale pilot order can help verify:
- roll-to-roll consistency;
- packaging;
- winding;
- slitting;
- bulk installation;
- actual customer feedback.
The process could be:
Specification
↓
Small Sample
↓
Sample Roll
↓
Approved Reference
↓
Pilot Order
↓
Bulk Order
For long-term distributors, this process is more reliable than simply comparing prices.
What should be re-inspected after the first bulk order arrives?
Do not skip the incoming inspection entirely just because the sample passed.
It is recommended to conduct a re-inspection of a random sample:
- SKU;
- batch;
- shade;
- VLT;
- clarity;
- liner;
- adhesive;
- shrink.
It is not necessary to install every roll in its entirety.
However, you should verify:
Consistency between samples and bulk orders
If FUNO continues to refine its Automotive Window Film content system in the future, this step could be developed into a separate guide:
Automotive Window Film Incoming Quality Inspection Guide
How to determine whether the issue lies with the product or the installer?
If a window film exhibits abnormal performance during installation, do not immediately conclude:
The film is defective.
First, check:
- the installer;
- shop temperature;
- heat setting;
- glass cleanliness;
- shrink method;
- solution;
- film batch.
If:
The same installer
- the same equipment
- the same glass
- the same process
Multiple consecutive pieces from the same sample exhibit:
- difficult shrink;
- same crease;
- adhesive issue;
only then is it worth further investigating product consistency.
This is also why standardized test conditions are important.
Does Signal Compatibility need to be tested?
It depends on the product and market.
For:
- metalized film;
- sputtered film;
- conductive constructions;
If target customers are particularly concerned about:
- GPS;
- mobile signal;
- toll tags;
- antennas;
- RFID;
corresponding in-vehicle validation tests can be added.
However, do not simply state:
All metallized films interfere with signals.
Product structures and vehicle systems vary significantly.
Therefore, this should fall under:
market-specific optional test
rather than a standardized test item required for every automotive window film.
How should Scratch Resistance be tested?
Automotive window films typically feature a scratch-resistant surface treatment.
Purchasers can conduct mild comparative inspections.
However, the following are not recommended:
- steel wool;
- knives;
- coins;
Conducting destructive demonstrations without established standards.
On-site testing is more suitable for determining:
whether there are noticeable differences in surface treatment between products.
If formal abrasion performance data is required, refer to:
- supplier test data;
- laboratory methods.
Do not treat DIY scratch demonstrations as standard tests.
How should private-label brands approve automotive window films?
Private-label buyers, in particular, should establish a formal approval process.
Do not simply tell suppliers:
“I want something similar to this.”
Instead, define:
Product Technology
For example:
- Nano Ceramic
- Nano Carbon
- Sputtered
Target VLT
Shade
Optical Quality
Technical Performance
Shrink Behavior
Adhesive Preference
Roll Size
Packaging
Then approve:
one exact reference sample
Manage every future production run based on:
approved specifications + approved sample.
How does FUNO recommend that customers test automotive window film samples?
FUNO serves:
- importers;
- distributors;
- tint shops;
- installer networks;
- wholesalers;
- private label brands
providing automotive window film products and bulk supply support.
For new automotive window film procurement projects, we strongly recommend the following process:
Market Requirement
↓
Specification Review
↓
Sample Selection
↓
Bench Test
↓
Real Installation
↓
Installer Feedback
↓
Approved Sample
↓
Bulk Supply
Purchasers can first determine their product direction through FUNO’s Automotive Window Film product portfolio.
If the goal is high-end non-metallic solar-control film, they can further evaluate Nano Ceramic Window Film.
If the market requires a balanced price and a neutral black appearance, they can test Nano Carbon Film.
For deposition-based premium solar-control applications, consider evaluating Sputtered Window Film.
The actual product selection should not rely solely on the material name.
Ultimately, the following are required:
Specifications + Samples + Installer Feedback
Let’s decide together.
FAQ
What should be tested first for automotive window film samples?
First, confirm the sample’s identity, then check the shade, clarity, VLT, and actual installation performance.
For professional procurement, you should also test the liner, adhesive, and heat shrinkage.
Can an A4 sample be used for final bulk approval?
Not recommended.
A4 samples are suitable for initial screening but cannot fully verify heat shrinkage, roll handling, and actual rear window installation.
How do you test the VLT of automotive window film?
It is recommended to use the same meter, the same reference glass, and the same test location for supplier-to-supplier comparisons.
Can a handheld IR meter verify a supplier’s IRR?
It can help with relative comparisons, but it does not automatically equate to a full laboratory IRR or IRER test.
Can a heat lamp demonstrate TSER?
No.
A heat lamp is suitable for demonstrations, but it cannot replace standard solar-performance testing.
Why is it essential to test automotive window film for heat shrinkage?
Because curved glass surfaces, such as the rear window, require heat shrinkage to allow the film to conform to the curvature.
Shrink behavior directly affects installer efficiency and rework rates.
Why does freshly installed window film look slightly foggy?
Temporary moisture may be present after wet installation.
Final clarity and adhesive appearance should be assessed only after the film has stabilized sufficiently.
How can you verify that a bulk order matches the approved sample?
Retain the approved reference sample and take samples from the first bulk batch for comparison:
- shade;
- VLT;
- clarity;
- adhesive;
- shrinkage.
Does a single sample that performs well indicate a reliable supplier?
Not necessarily.
True B2B quality comes from:
consistency between samples and bulk production + consistency between batches.
Don’t just test a single film; test the supplier’s overall capability.
The most common mistake made before purchasing automotive window film in bulk is:
Reviewing the spec sheet
Taking a single sample
Deciding the color looks good
And then placing a large order right away.
The truly professional process should be:
Confirm Sample Identity
↓
Understand Technical Specs
↓
Check Shade and Optical Quality
↓
Retest VLT under identical conditions
↓
Correctly interpret IR / TSER claims
↓
Test the liner and adhesive
↓
Test heat shrinking
↓
Complete installation on actual automotive glass
↓
Re-inspect after stabilization
↓
Collect Installer Feedback
↓
Retain Approved Reference Sample
↓
Re-validate Bulk Production
For importers, distributors, and private label brands, what you’re purchasing isn’t:
A nice-looking sample.
But rather:
Whether the supplier can consistently produce a product identical to the approved sample.
FUNO supports global automotive window film customers with product screening, sample evaluation, specification confirmation, OEM/private label packaging, and subsequent repeat roll supply.
If you’re looking for a new automotive window film supplier, test the samples first, then discuss bulk orders.
Specification sheets help you screen suppliers, real-world installation helps you approve products, and the consistency of repeat batches ultimately determines whether a supplier is worth a long-term partnership.
Related Posts

Contact FUNO
Tell us your target market, product category, preferred specification, estimated purchasing volume, and whether you need standard or private label supply.
FUNO can help you narrow suitable film options, sample requirements, packaging needs, and the next step toward bulk purchasing.